My brother and I worked together to develop a fully automatic bench top size plastic injection machine, which is currently being assembled as I write this. We restricted ourselves to using materials that were available to us when designing the machine, and as time went on we progressed to using more complex materials as part of the design. While it's true that some aspects of our plans are contingent on having access to the necessary resources and that different things would be required in different ways, we've included a rendering of our design to give you a better understanding of what we're discussing. It was also a great accomplishment for us to complete some design work and then machine all of the raw steel with our own custom-built CNC machine, which was a huge undertaking. You will be able to watch a video of our CNC machine in action, which we designed and built ourselves, in the following description.
The universal pin plate, which I found to be my personal favorite component of the machine because it worked flawlessly, was something I personally enjoyed. The machine was assembled in just two days, according to our estimates. We followed a similar procedure for putting the rest of the parts together, and everything went smoothly this time. It was only after that that we had to make a few random test molds, which went without incident as well. Because of the time constraints, I chose to reuse an existing project in order to produce a quick and low-quality aluminum injectionplastic injection molding parts; these were specific electronic circuit board housings that I knew would take a long time to design from the ground up. Despite the fact that I was aware that they would not be able to withstand the high temperature and pressure mixture, we performed an extremely quick ejector pin test to make sure that all of our mold pieces were lined up correctly. The mold springs passed the test with flying colors, so we were pleased with our results.
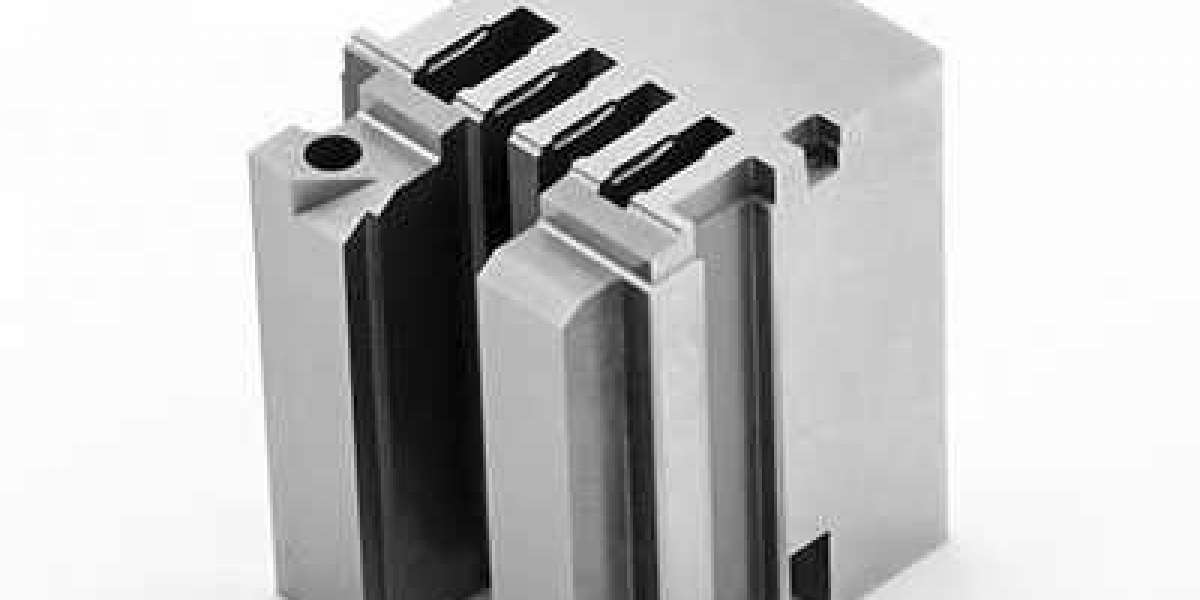
Due to the fact that we wanted to finish sandblasting the injection blow mold manufacturer after they were finished, I was only able to put the melt into the plastic blow mold as soon as they were finished, which meant that I could only put the melt into the as soon as they were finished. To say that we were in charge of the electrical and electronic aspects of our project would be an understatement of our capabilities. A Raspberry Pi served as the brain of our custom small case, which we designed and built from scratch ourselves. A custom user interface was then created and the program was then run using Python code, which we wrote afterwards. In order to make the controller more user-friendly for the end user, an additional 10-touch screen has been integrated into the controller. It is as a result of this improvement that the machine has become more user-friendly in the process. The fact that the code had already been compiled meant that we were prepared to put it through its paces as soon as it was finished. We'd like to get a closer look at the finished product up close and personal before moving forward. Please keep in mind that the mold has been anodized in red as a result of the anodizing process that we demonstrated in our anodizing video, which you can view by clicking on the link provided. In the event that you require any additional information, please refer to the section below for more information. We turned on the power and performed an ejection test to ensure that everything was in proper working order before proceeding. After conducting the test, it was discovered that everything was in proper working order. Our fully automatic, garage-sized plastic injection molding machine, which is labeled with its model number on the side, can be seen in this photo:It was successfully completed with a high degree of success.
To save time and money, we'll stick to ABS plastic for the time being. We can use any type of plastic, starting with the smallest plastic pellets and working our way up. Heating occurs as the plastic is moved from one chamber to another through the reciprocating screw chamber, and this is accomplished through the use of band heaters. While going through the plasticization process, the plastic is passed through a check valve and into an injection chamber, where it fills the chamber and is then removed from the machine and disposed of properly. Then, in order to avoid any confusion, this procedure is repeated for each of the different plastics one by one. A. The word "a" refers to the word "as" in the phrase "as in the case of."It is the word as in the phrase as in the case of that is referred to by the preposition a. This performance will include the floating circle being pushed back to its maximum possible distance. When the limit switch is depressed, the injection process will begin as soon as the switch is depressed, regardless of how long the switch has been depressed. It will take place within the next few minutes, and the injection will take place immediately after that. It is possible to perform a complete injection molding operation by injecting all of the plastic into theplastic injection molding in one continuous line, and then removing theplastic injection molding services when the plastic has been injected into the cavity. Pay close attention to the way the pin is inserted; you'll notice that it pushes the plastic piece out of the socket when the pin is inserted. As a result, our injection molding machine is configured to run as many cycles as the is capable of producing at the time of writing, in order to produce the greatest number of cycles possible. In the custom control section, we have written an entirely in Python visual user interface that will run all of the functions that we wrote in order to automate the machine and provide feedback to the user. Allow yourself to be creative and have a good time with it; it will be a lot of fun. This is merely a passing observation on the subject. You should just go ahead and give it a shot; you'll find that it's surprisingly enjoyable very soon after.
In greater detail, describe the operation of our user interface and how it can be customized. You can tell the machine where it is going to take the mold next by pressing set. You can also select how far the motor will travel by pressing the motor Travel button. The eject distance can also be customized, and the interface will show you how much material has been ejected as a result of your selection. When you are ready to begin filling the injection chamber with material, press the cycle start button located on the injection chamber's control panel. After the injection has been completed, the plastic mold will be closed until it reaches the predetermined position that we have designated for testing here, and the injection will take place as a result of this action. There are a slew of other features to take advantage of, in addition to the two massive three horsepower injection motors, dual stepper motors for clamping the 30mm ball screws, and, most importantly, the fact that it is powered entirely by electrical energy, that this fully automatic tabletop sized plastic injection machine has to offer. If you like our build, please like and share this video with your friends and family. Thank you for your support. Thank you very much for your assistance. Please accept my heartfelt thanks for your assistance. It is possible, however, for you to return to this page for additional content of a similar or identical nature if you do not want to do so.
My brother and I worked together to develop a fully automatic bench top size plastic injection machine, which is currently being assembled as I write this
Kommentarer